

IKEA Milsbo Greenhouse
Transform your Ikea Milsbo cabinet into a vibrant indoor garden with our 3D printed kit! Our kit includes all the pieces you need to convert your Milsbo cabinet into a fully functional greenhouse. The kit is easy to assemble and customizable to fit your specific needs, making it perfect for plant enthusiasts of all levels. You'll be able to create a thriving ecosystem for your favorite plants while also adding a stylish and unique touch to your home decor.
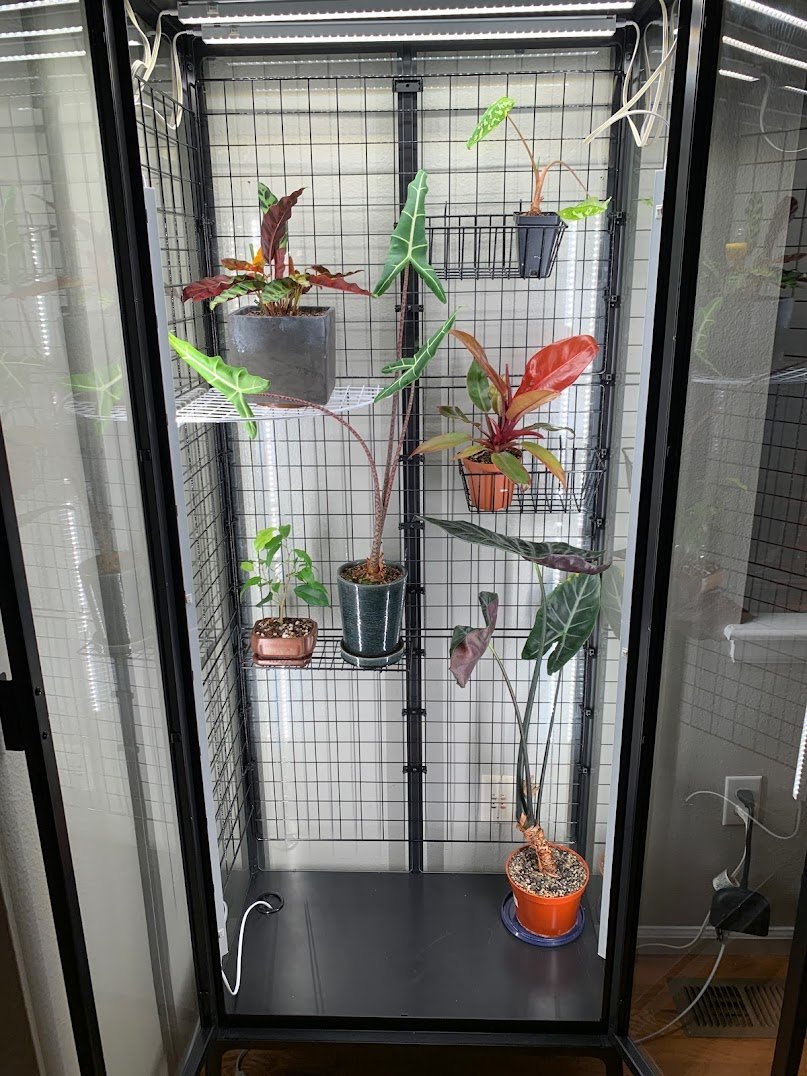
When we were planning out our Milsbos (yes, we have 2!), we wanted to maximize the available space and have good light for everything. I wanted to keep things flexible if possible to allow plants to grow and rotate out so I really liked the idea of doing wire grids instead of acrylic shelving. This route was also more affordable than the acrylic options I was looking at.


I wanted to leave space for my bigger plants so I decided to only do the grids on one side. If you’re ordering a clip kit from Etsy you can request clips to accommodate grid panels on both sides, neither, or just one. I recommend the one side as shown but it depends on your plants/space what makes sense!

Corner clip shown with only the back panel grid - no side grid attached.

Corner clip shown with rear and side panels attached. Because of the weight of the plants, I reinforced with 2 zip ties on each clip.
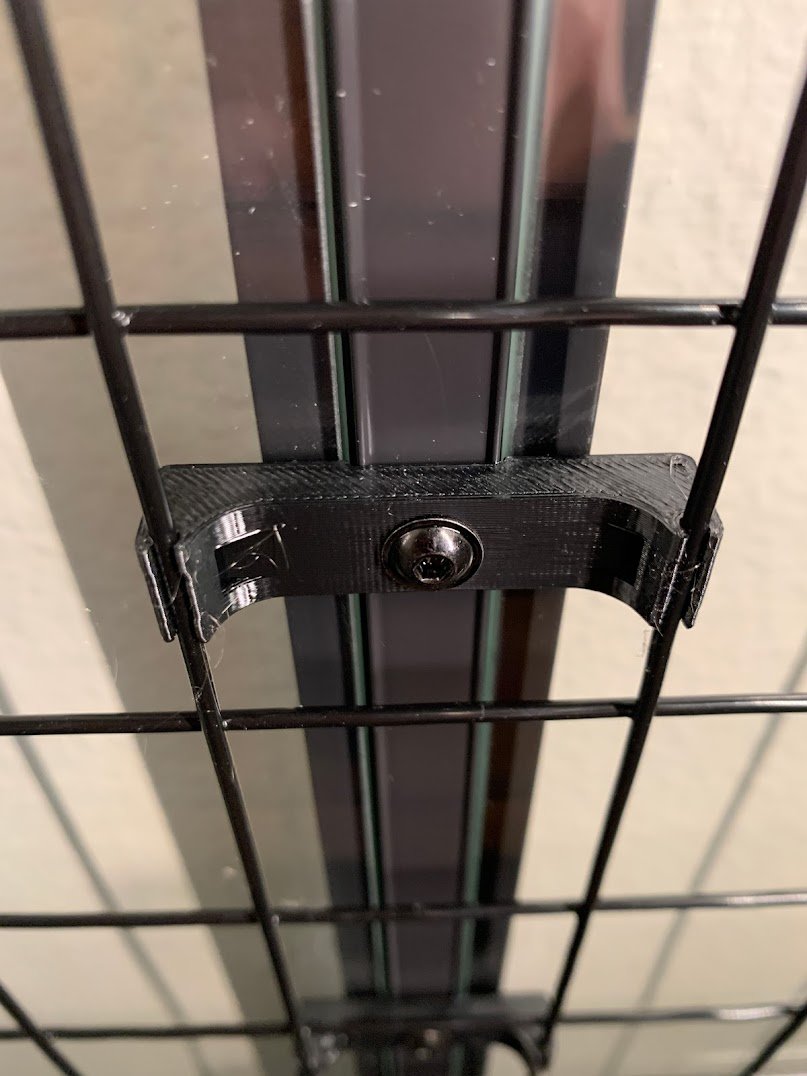
This is the clip on the center bar in the back.

Reinforced with zip ties here also.
I used a variety of different baskets and shelves. I’ll share details and links at the end of this post!

This is something I added later to start my alocasia corms. I’ll link the basket below. I lined it with a plastic non-zip gallon bag and filled it with sphagnum moss. This works super well! I water directly into this and fill with about an inch of water at least once/week. The moss will soak it up and I’ve never had leaks. It’s a few inches below the grow lights on the top of the Milsbo so it dries out quickly. Highly recommend this set up!

This was my original set up for my tropical cabinet. It changes frequently as plants grow and get repotted!

This is our “desert” cabinet. This one is pretty straightforward since I wanted heat and limited humidity. Lots of light was the main objective. This has been up and running for 6 months at the time I write this and everything in this one is THRIVING!
LINKS
These are commissionable links which means you can support my small business by shopping through my links at no extra cost to you. No pressure though!
Comment on this post, send a Contact form, or message us on social media or Etsy if you have questions about our Milsbos, kits, or the links below!
Grid panel clip kit - These clips were all designed by us, and have been tested in two Milsbos over the course of several months. You won’t find anything like this anywhere else!
Screws (for the clip kit) - It’s a pack of 100 which is more than you need so share with a friend!
Back wire panels - These should be 15 squares long and 10 squares wide. Have to order 2 packs. You will have one panel leftover. NOTE: Please confirm before ordering that the dimensions of the product are 25.6”x17.7” as Amazon sometimes updates their listings without warning.
Side panels - One 3-pack per side (So buy two 3-packs if you want grids on both sides. Skip entirely if you’re not doing side panels.) NOTE: Please confirm before ordering that the dimensions of the product are 16”x12” as Amazon sometimes updates their listings without warning.
Shelves - These are my favorite shelves! You can fit pretty large pots on them and without walls they’re not limiting.
Corner shelf - I love this shelf! I used it upside down and fit it behind the back/side grid panels. It fits well and is very sturdy - the downside is that you can probably only fit one because of the way the grid panels line up. You also have to have the side panels to support this one. It also only comes in white. But definitely get one if you’re doing a side panel!
Deep shelf - This is a pretty hefty shelf and at 5.6” deep it fits fairly large pots. It’s more expensive than some others though and isn’t essential.
Shallow basket - You could probably skip these and just get more of the basic shelves. They hang at a slight angle down so either tuck something behind them to level them or just be aware when you water.
Deep baskets - I got several of these because the basic shelves went out of stock but I mostly don’t like them. They’re narrow at the bottom so it’s difficult to find drip trays that fit. I do love them for starting alocasia corms (described above), and they would work well for cuttings etc. Pick up a pack if you think you’d use them for that - otherwise skip.
Grommets - These work great for the holes we drilled at the bottom for cable routing.
Fans (One 2-pack, or more according to your preferences)
Grow lights - I used 2 of these on each of the front corners and 3 on the ceiling, for a total of 7 lights. These are my favorite grow light strips - cool without being cold (I got yellow), and provide great light without burning my plants.
Shorter lighting cables - These are optional but great for cleaning up cable management between the lights on the ceiling.
Zip ties - Used to secure grid panels to the clips. One bag will last you…forever.
Magnets - I used these to attach the lights to the top of the cabinet. The lights aren’t compatible with magnets but you can use the clips that come with the lights and use these magnets instead of the hook part of the clips.